Furnace Repair Service: What to Expect During a Professional Visit

When the winter chill sets in, the last thing you want is a malfunctioning furnace. Whether your living room feels chillier than usual or your energy bills are on the rise, these issues could signal that a furnace repair is in your near future. Understanding what to expect during a furnace repair service visit can help you feel more at ease and ensure that your heating system is in expert hands. This guide will walk you through the furnace repair process, how to prepare for the technician’s visit, and the common repairs that may be necessary.

With insights from experts at Lochard HVAC, Plumbing & Service, and tips for homeowners in Sidney, Piqua, Troy, Anna, Bellefontaine, and Celina, you’ll be well-equipped to handle your next furnace repair visit confidently and keep your home warm and comfortable.

Key Takeaways

  • Early detection of furnace issues can prevent costly repairs and prolong system life.
  • Clear communication with technicians ensures a smooth, efficient repair process.
  • Preparing your home for the technician’s visit creates a safe and effective repair environment.
  • Understanding the steps of a furnace repair service can help you anticipate the process and make informed decisions.
  • Regular maintenance, such as replacing air filters, maximizes your furnace’s efficiency and longevity.

Understanding Your Furnace Repair Service Process

When your furnace starts acting up, knowing what happens during a professional visit can make the repair process less stressful. The service typically includes identifying the problem, testing and troubleshooting, providing an estimate, performing repairs, and testing for safe operation. Here’s a detailed breakdown:

1. Identifying the Problem With Your Furnace

The first step in any furnace repair is pinpointing the problem. Homeowners should keep an eye out for common symptoms like unusual noises, uneven heating, unexpected increases in energy bills, or persistent odors. Describing these issues accurately to the technician can help them diagnose the problem faster and more effectively.

Pro Tip: Before the technician arrives, make a note of any abnormal behaviors, sounds, or smells coming from your furnace. This information will be invaluable during the technician’s initial inspection, allowing them to focus on potential problem areas quickly.

2. Scheduling a Convenient Service Visit

When it becomes clear that your furnace needs professional attention, schedule a repair visit as soon as possible to prevent further issues. Choose a time that fits your schedule and minimizes disruption to your daily routine. Lochard HVAC, Plumbing & Service offers flexible booking options to accommodate different availabilities. During your initial call, ask how long the visit might take so you can plan accordingly.

Pro Tip: Be ready to discuss your furnace’s symptoms when you schedule the visit. This allows the technician to arrive prepared with the necessary tools and parts, potentially shortening the repair time.

3. Preparing Your Home for the Technician’s Arrival

To ensure a smooth and efficient repair visit, clear the area around your furnace and remove any objects or furniture that might obstruct access. This not only ensures the technician can work safely but also minimizes the service duration.

Securing Pets: Keep pets away from the work area to create a distraction-free environment and ensure the safety of both the technician and your animals. Taking these simple steps will help create a professional, effective repair environment.

What to Expect During the Furnace Inspection

When the technician from Lochard HVAC arrives, they will conduct a thorough inspection of your furnace to identify the root cause of the problem. This process typically includes:

1. Initial Inspection and Testing

The technician will first assess the furnace’s overall operational status. They will inspect key components like the thermostat, heat exchanger, blower motor, ignition system, and flame sensor. Additionally, they’ll check the filter, ductwork, and gas supply lines to ensure nothing obstructs airflow or fuel delivery.

Testing and Troubleshooting: Next, they will perform a series of tests using advanced diagnostic tools. For example, if the furnace isn’t producing heat, they might check the thermostat settings, ignition system, and pilot light. If it’s cycling on and off frequently, they could inspect the blower motor, limit switch, or flame sensor to pinpoint the issue.

Pro Tip: The technician may use specialized equipment like a multimeter to gauge electrical input and output, or thermal imaging cameras to detect heat patterns. These tools enable accurate diagnosis and targeted repairs, minimizing guesswork and ensuring your furnace is restored to optimal performance.

2. Providing a Detailed Estimate

After the inspection and testing phase, the technician will discuss their findings with you and provide a detailed estimate for the repair. This will include the cost of replacement parts (if needed), labor, and any other charges.

Transparent Communication: Lochard HVAC technicians take the time to explain each aspect of the repair, ensuring you understand the scope of work before proceeding. This transparency fosters trust and empowers you to make informed decisions about the repairs.

Performing Common Furnace Repairs

Once you approve the estimate, the technician will begin the repair process. Here are some common repairs you might encounter during a service visit:

1. Cleaning or Replacing the Air Filter

A clogged or dirty air filter can restrict airflow, reduce efficiency, and cause the furnace to overheat. During the service visit, the technician will inspect the filter and replace or clean it as needed. This simple maintenance task can significantly improve air quality, optimize system performance, and extend the life of your furnace.

Immediate Benefits: A new, clean filter not only improves your furnace’s efficiency but also enhances indoor air quality, providing a healthier environment for your household.

2. Fixing Faulty Components

Common repairs include replacing a malfunctioning thermostat, repairing a broken blower motor, or cleaning a dirty flame sensor. In more complex situations, parts like the heat exchanger might need replacement. Technicians from Lochard HVAC carry a wide range of parts in their service vehicles, enabling them to complete most repairs on the spot. If a specific part is not immediately available, they will schedule a follow-up visit at your convenience.

3. Testing for Safe Operation

After completing the necessary repairs, the technician will test your furnace to ensure it operates safely and efficiently. This includes verifying proper ignition, adequate heat production, and proper cycling. They will also check for gas leaks, carbon monoxide emissions, and ensure that airflow is unrestricted, leaving no stone unturned when it comes to your home’s heating system.

Post-Repair: Maintenance Tips for Optimal Furnace Performance

A professional technician will also provide maintenance tips to help keep your furnace in peak condition. Simple actions like regularly changing air filters, keeping vents unobstructed, and scheduling annual tune-ups can significantly extend the lifespan of your furnace and reduce the likelihood of future breakdowns.

Pro Tip: Make a habit of checking your furnace’s air filter monthly during the heating season. A clean filter maintains efficient airflow, improves indoor air quality, and helps prevent unnecessary wear and tear on the system.

Frequently Asked Questions (FAQ)

Q: How often should I have my furnace serviced?
A: It’s recommended to have your furnace serviced at least once a year, ideally in the fall before the heating season begins. Regular maintenance ensures efficient operation and reduces the risk of breakdowns.

Q: What are common signs that my furnace needs repair?
A: Look for signs like strange noises, inconsistent heating, frequent cycling, unusual odors, and an unexplained increase in energy bills.

Q: How long does a typical furnace repair take?
A: Most furnace repairs can be completed within 1–2 hours, depending on the complexity of the issue and the availability of parts.

Q: Is it better to repair or replace my old furnace?
A: If your furnace is over 15 years old and requires frequent repairs, it might be more cost-effective to invest in a new furnace. A professional technician can help you assess your specific situation.

Q: Can I troubleshoot my furnace before calling for repair?
A: Yes, you can check the thermostat settings, change the air filter, and ensure the circuit breaker hasn’t tripped. If the problem persists, it’s best to call a professional.

Q: Why is my furnace making strange noises?
A: Strange noises, such as banging, rattling, or squealing, can indicate issues with the blower motor, fan belt, or other internal components that require professional attention.

Call Lochard HVAC, Plumbing & Service for Reliable Furnace Repair

If your furnace is showing signs of trouble, don’t wait until it’s too cold to handle. Lochard HVAC, Plumbing & Service is here to provide prompt and professional furnace repair services. Our experienced technicians will diagnose and fix any furnace issue, ensuring your home stays warm and safe throughout the winter. Serving Tipp City, West Milton, New Bremen, Jackson Center, Degraff, and Quincy, we’re your trusted local heating experts. Contact us today to schedule a service and keep your furnace running smoothly!

How to Detect a Water Leak in Your Home

Water damage can be a homeowner’s worst nightmare, leading to costly repairs and potential long-term damage if not addressed promptly. Detecting a water leak early is crucial to protecting your home’s integrity and preventing disasters. At Lochard HVAC, Plumbing & Service, we specialize in leak detection and pipe repair, helping you keep your home safe and dry. In this guide, we’ll cover how to identify the signs of a water leak, the steps you should take if you suspect a leak, and the benefits of choosing professional services to address the issue.

Key Takeaways

  • Unexplained spikes in your water bill could signal a hidden leak.
  • Discoloration, mold, or damp spots on walls, ceilings, or floors are strong indicators of leaks.
  • Regular home inspections can prevent extensive water damage.
  • Lochard’s experts specialize in swift, reliable leak detection and repair.
  • Immediate action is essential when you discover a water leak.

Signs of a Water Leak in Your Home

Water leaks can be subtle, but they often leave behind clues. Here’s what you should look out for:

  1. Unexplained Increase in Water Bills:
    A sudden, unexplained spike in your water bill is one of the earliest signs of a leak. Even a small, unnoticed leak can significantly increase your water usage over time. Monitoring your bills monthly can help you catch leaks before they worsen.
  2. Damp or Wet Spots on Walls, Ceilings, or Floors:
    If you notice damp spots or discoloration on your walls, ceilings, or floors, a leak may be lurking behind the surface. These spots might appear brownish or moldy, indicating moisture where it shouldn’t be. It’s crucial to address these signs promptly to avoid further damage.
  3. Musty Odors:
    A persistent musty smell often indicates hidden water leaks. This odor is typically caused by mold or mildew thriving in moist environments, such as behind walls or under floors. If you detect a musty smell in areas like the basement, attic, or under sinks, it’s likely time to investigate further.
  4. Sound of Running Water:
    Hearing running water when no taps are on? This could mean a leak within your walls, floors, or underground pipes. The sound of water moving through the plumbing when it shouldn’t be is a clear sign that something’s amiss.
  5. Low Water Pressure:
    A sudden drop in water pressure across your home could signal a significant leak. This is often caused by a burst pipe or a major leak diverting water from your fixtures. Low water pressure shouldn’t be ignored—it’s a sign to call in the experts.
  6. Wall or Ceiling Discoloration:
    Look for brownish stains or a sudden appearance of mold or mildew on walls and ceilings. These are tell-tale signs that moisture has infiltrated areas it shouldn’t be, indicating a possible leak.
  7. Warping, Cracking, or Buckling Floors:
    Your floors can also reveal the presence of a water leak. If you notice unusual warping, cracking, or buckling, it may be due to water damage underneath. This kind of damage often occurs when leaks go unnoticed for too long.

Steps to Take If You Suspect a Water Leak

If you think you might have a leak, don’t wait—take these steps to protect your home:

  1. Check Your Water Meter:
    One of the most reliable ways to confirm a leak is by checking your water meter. Start by turning off all water-using appliances and fixtures. Then, note the water meter reading and wait for a few hours without using any water. If the meter reading has changed, you likely have a leak.
  2. Inspect Common Leak Areas:
    Focus your inspection on areas where leaks are most common: under sinks, around toilets, behind appliances, and near outdoor spigots. Look for any signs of moisture, corrosion, or mold growth.
  3. Investigate Fixtures and Appliances:
    Examine faucets, showerheads, and the bases of toilets for drips or seepage. Also, check exposed piping in basements and utility rooms for puddles or corrosion, which could indicate a leak.
  4. Listen for Unusual Sounds:
    If you hear water running or dripping when everything is off, this could indicate a hidden leak. Pay attention to any strange sounds in your plumbing.
  5. Contact a Professional for Leak Detection:
    While some leaks are easy to spot, others may be hidden deep within your walls or underground. For these situations, it’s best to call a professional plumbing service. Lochard HVAC, Plumbing & Service uses advanced tools to accurately locate and repair leaks, preventing further damage to your home.

Why Choose Lochard HVAC, Plumbing & Service for Leak Detection and Pipe Repair?

When it comes to protecting your home from water damage, you need a reliable partner. Here’s why Lochard HVAC, Plumbing & Service should be your first call:

  1. Expertise and Experience:
    Serving the communities of Sidney, Piqua, Troy, Anna, Bellefontaine, and Celina for decades, Lochard HVAC, Plumbing & Service has a team of seasoned professionals who specialize in detecting even the most challenging leaks.
  2. Advanced Technology:
    We use state-of-the-art leak detection tools that allow us to find leaks that aren’t visible to the naked eye. This ensures that we can address the problem quickly and effectively, minimizing any potential damage to your home.
  3. Comprehensive Services:
    Whether you need leak detection, pipe repair, or a complete plumbing installation, our team is here to help. We provide clear explanations and actionable advice, ensuring you’re fully informed before any work begins.
  4. Customer-Centric Approach:
    We’re committed to providing excellent service with minimal disruption to your property. Our thorough inspections and expert repairs are designed to get your home back to normal as quickly as possible.
  5. Emergency Services:
    Leaks can happen at any time, which is why we offer round-the-clock availability for emergencies. You can count on us to be there when you need us most.

FAQ Section

Can I detect a water leak without professional equipment?
Yes, you can perform a basic assessment for leaks by checking for visible signs such as water stains, warped floors, and musty smells. However, for subtle or hidden leaks, professional detection tools may be necessary.

What should I do if I find signs of a leak?
If you encounter evidence of a leak, shut off the water supply if possible and contact a professional plumber. Prompt action can prevent further damage and costly repairs.

How often should I check my home for leaks?
Regular inspections can catch leaks before they escalate. We recommend checking your home quarterly, especially after extreme weather changes, which can stress plumbing systems.

Will a small leak eventually stop on its own?
Unfortunately, small leaks typically worsen over time and rarely resolve without intervention. Addressing them quickly with the help of skilled technicians can avoid more serious damage to your home’s structure and plumbing.

How long does it take to repair a leaking pipe?
The time required to repair a leaking pipe depends on the severity and location of the leak. Minor repairs can be completed quickly, while more complex issues may take longer.

Will my homeowner’s insurance cover water leak repairs?
Coverage for water leak repairs varies by policy. It’s best to check with your insurance provider to understand your coverage.

Don’t Let a Leak Become a Disaster!

Detecting a water leak early is crucial for preventing costly and extensive damage to your property. Lochard HVAC, Plumbing & Service encourages regular home inspections for signs like unexplained water bills or damp floors. For elusive leaks, our professional services offer precise detection and effective pipe repair solutions, ensuring minimal disruption to your home.

Taking proactive steps and seeking professional help at the first sign of trouble can protect your investment and provide peace of mind. If you suspect a water leak, don’t wait—contact Lochard HVAC, Plumbing & Service today to schedule an appointment. We’re here to help you keep your home safe, dry, and damage-free.

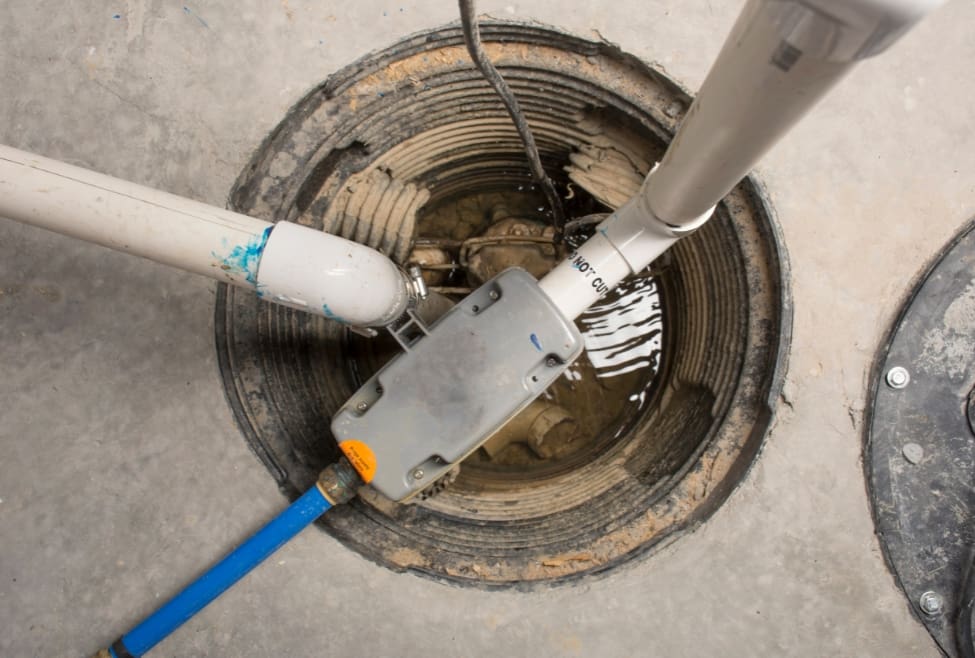
A close-up view of a sump pump system installed in a basement. The image shows the sump pit with PVC pipes connected to the pump, which is partially submerged in water. This setup is crucial for preventing basement flooding in homes across Sidney, Ohio, and surrounding areas. sump pump repair, basement flood prevention, plumbing services, Sidney Ohio, Piqua, Troy, Anna, Botkins, Fort Loramie, sump pump installation, emergency plumbing, water damage prevention, Lochard HVAC Plumbing & Service.

What to Do When Your Sump Pump Stops Working

A sump pump is the silent guardian of your home, tirelessly working to keep your basement or crawl space dry. However, when this crucial piece of equipment fails, your home becomes vulnerable to flooding and water damage. For homeowners in Sidney, Ohio, and surrounding areas, understanding the steps to take when your sump pump stops working is vital. At Lochard HVAC, Plumbing & Service, we specialize in sump pump repair, replacement, and maintenance, ensuring your home stays dry and protected.

Key Takeaways

  • Immediate action can prevent extensive water damage when your sump pump stops working.
  • Regular maintenance and inspections can prevent unexpected sump pump failures.
  • Unusual noises often signal a need for professional sump pump repair or replacement.
  • Lochard HVAC, Plumbing & Service offers emergency services to keep your home safe from flooding.
  • Sump pumps typically last 7-10 years, with regular maintenance extending their lifespan.

Immediate Steps to Take When Your Sump Pump Stops Working

When your sump pump fails, quick action is crucial to prevent water damage. Here are the immediate steps you should take:

1. Check the Power Source

The first thing to do when your sump pump stops working is to check its power source. Ensure the pump is plugged in and that the circuit breaker hasn’t tripped. A power outage or interrupted supply is often the root cause of sump pump malfunctions. If the pump still doesn’t work, try plugging it into a different outlet to rule out a faulty electrical connection.

Pro Tip: Keep your sump pump connected to a dedicated circuit to prevent tripping due to overloads from other appliances.

2. Inspect the Discharge Pipe

A clogged or frozen discharge pipe can prevent your sump pump from effectively removing water. Inspect the pipe for any obstructions, such as debris, mud, or ice. If you find a blockage, clear it out and see if the pump resumes normal operation. If the pipe is frozen, use a hairdryer or heat gun to carefully thaw the ice, taking care not to damage the pipe.

Pro Tip: Installing a discharge line protector can help prevent blockages and keep water flowing freely.

3. Test the Float Switch

The float switch is a critical component that activates the sump pump when water levels rise. If the float is stuck or damaged, the pump won’t turn on. To test the float switch, manually lift the float to see if the pump starts. If it doesn’t, the switch may need to be replaced. Our team at Lochard HVAC, Plumbing & Service can quickly diagnose and repair or replace a faulty float switch.

Pro Tip: Ensure that the float switch moves freely within the sump pit and isn’t obstructed by debris.

4. Examine the Sump Pit

Debris in the sump pit can also cause the pump to malfunction. Check the pit for any dirt, gravel, or other debris that may be interfering with the pump’s operation. Clean the pit and test the pump again to see if it resolves the issue. Regular maintenance, such as cleaning the sump pit, is key to preventing sump pump failure.

Pro Tip: Schedule regular cleanings of your sump pit to maintain optimal pump performance and prevent debris build-up.

5. Listen for Unusual Noises

If your sump pump is making strange noises, such as grinding, rattling, or excessive vibration, it could be a sign of a mechanical issue. Unusual noises often indicate that the pump’s motor, impeller, or other internal components are worn out or damaged. In such cases, it’s best to contact a professional for sump pump repair or replacement.

Pro Tip: Regularly check for unusual noises as part of your maintenance routine to catch problems early.

When to Call for Professional Help

While some minor issues can be resolved with basic troubleshooting, more serious problems require professional attention. If your sump pump fails and you’re unable to fix it yourself, it’s time to call Lochard HVAC, Plumbing & Service. We offer expert sump pump repair and replacement services in Sidney, Piqua, Troy, Anna, Botkins, and Fort Loramie, ensuring your home is protected from water damage.

When to Call a Professional:

  • If your sump pump is making persistent unusual noises, such as grinding or rattling.
  • If your sump pump fails to activate despite checking the power source, discharge pipe, and float switch.
  • If water overflows from the sump pit, indicating that the pump is not effectively removing water.
  • If the sump pump cycles on and off irregularly, which may indicate a problem with the float switch or electrical components.

Emergency Services: During severe weather or persistent rainfall, a fully operational sump pump is crucial. Lochard HVAC, Plumbing & Service offers emergency services to swiftly address disruptions in sump pump functionality, safeguarding your home from the risks of water intrusion and flooding.

Preventative Measures to Keep Your Sump Pump Running Smoothly

Preventing sump pump failure starts with regular maintenance and proactive measures. Here’s how you can keep your sump pump in top condition:

1. Regular Maintenance

Schedule annual maintenance for your sump pump to ensure it remains in good working condition. Our team can inspect the pump, clean the sump pit, and test the system to identify any potential issues before they become major problems.

Pro Tip: Testing your sump pump periodically by pouring water into the sump pit can verify that the pump activates and effectively drains the water.

2. Install a Backup System

Consider installing a battery backup sump pump system to provide extra protection during power outages. A backup system ensures that your sump pump continues to operate even when the primary power source is unavailable.

Pro Tip: Replace your sump pump’s battery backup every two to four years to maintain uninterrupted service during power outages.

3. Upgrade to a New Sump Pump

If your sump pump is old or frequently breaks down, it may be time to upgrade to a new, more reliable model. We offer professional sump pump replacement services and can recommend the best options based on your home’s specific needs.

Pro Tip: Sump pumps typically last 7-10 years, but regular maintenance can help extend their lifespan.

Contact Lochard HVAC, Plumbing & Service for Reliable Sump Pump Solutions

Don’t wait until your basement floods to address sump pump issues. At Lochard HVAC, Plumbing & Service, we provide top-notch sump pump repair, replacement, and maintenance services to keep your home dry and safe. Serving Piqua, Troy, Anna, Bellefontaine, Celina, and surrounding areas, our experienced technicians are here to help with all your sump pump needs. Contact us today to schedule a service or learn more about our comprehensive plumbing solutions.

FAQs: Sump Pump Troubleshooting and Maintenance

Q: How often should I test my sump pump?
A: It’s recommended to test your sump pump every three to four months, especially before the rainy season, to ensure it’s functioning properly.

Q: What are the signs that my sump pump needs to be replaced?
A: If your sump pump is over 10 years old, frequently cycles on and off, makes unusual noises, or fails to remove water effectively, it may be time to replace it.

Q: How long do sump pumps typically last?
A: On average, sump pumps last around 7-10 years. Regular maintenance can help extend their lifespan.

Q: Can I install a sump pump myself?
A: While some homeowners attempt DIY sump pump installation, it’s best to hire a professional to ensure proper setup and avoid potential issues down the line.

Q: What should I do if my sump pump stops working during a storm?
A: If your sump pump stops working during a storm, check the power source, inspect the discharge pipe, and try to clear any debris. If these steps don’t work, contact a professional immediately for emergency sump pump repair.

How to Unclog a Toilet: Tips and Tricks

Expert Tips for Unclogging a Toilet: Your Comprehensive Guide 

Is there anything more stressful than a clogged toilet at the most inconvenient time? Whether you’re dealing with a minor blockage or a stubborn toilet clog, knowing how to handle it can save you time, money, and unnecessary frustration. At Lochard HVAC, Plumbing, and Service, we’ve compiled a comprehensive guide to help you tackle toilet clogs like a pro. Read on to learn effective methods to unclog a toilet and when it’s best to leave it to the experts. 

Identifying the Problem  

Before diving into solutions, it’s crucial to understand why your toilet may be clogged. Common causes include excessive toilet paper usage, flushing non-flushable items like wipes or sanitary products, or even mineral build-up over time. Identifying the cause can help determine the most effective approach to resolving the clog. 

Tools You’ll Need  

Gather the necessary tools before starting the unclogging process. A plunger is often the first line of defense against toilet clogs. Ensure it has a good seal around the drain hole to create the necessary suction. For more stubborn clogs, a toilet auger (also known as a plumbing snake) can be effective in breaking up and clearing blockages further down the drain. 

Steps to Unclog a Toilet 

  • Plunge Effectively: Place the plunger over the drain hole and plunge vigorously up and down. The suction created helps dislodge the blockage. Repeat as needed until the water begins to drain. 
  • Use a Plumbing Snake: If plunging doesn’t work, insert the toilet auger into the drain and rotate it gently. This tool can reach deeper into the pipes to break apart stubborn clogs. 
  • Hot Water and Dish Soap: For minor clogs, pouring hot water mixed with dish soap into the toilet bowl can help loosen the obstruction. 
  • Chemical Drain Cleaners: Use these products cautiously and strictly according to the manufacturer’s instructions. Avoid overuse as they can damage your pipes over time. 

When to Call a Professional  

If your attempts to unclog the toilet are unsuccessful or if you suspect a more serious issue such as a sewer line blockage, it’s time to call in a professional plumber near you. Our team at Lochard HVAC, Plumbing, and Service offers emergency plumbing services in Troy, Piqua, Sidney, Bellefontaine, Tipp City, and Celina. We have the expertise and equipment to handle even the toughest toilet clogs safely and efficiently. 

Preventing Future Clogs

Once you’ve successfully unclogged your toilet, take steps to prevent future clogs: 

  • Use moderate amounts of toilet paper and avoid flushing non-flushable items. 
  • Regularly maintain your plumbing system with preventive maintenance services. 
  • Educate household members on proper toilet usage to minimize the risk of clogs. 

Contact Us 

Facing a stubborn toilet clog that just won’t budge? Contact Lochard HVAC, Plumbing, and Service today! Our team is ready to provide prompt and reliable service to ensure your plumbing system runs smoothly. Whether it’s a clogged toilet or any other plumbing issue, we’re here to help. Call us now at (937) 492-8811 or schedule an appointment online for emergency plumbing services. 

FAQs 

How to unclog a toilet?  

Start by using a plunger to create a tight seal around the toilet drain and plunge vigorously up and down. This action helps dislodge the blockage by creating pressure. If plunging doesn’t work, try using a toilet auger (also known as a plumbing snake) to reach deeper into the pipes and break up the obstruction. Always be cautious not to damage the porcelain during these efforts. 

How to unblock a badly blocked toilet?  

For a severely blocked toilet, begin with a plunger and apply more forceful plunging to try and break apart the obstruction. If this doesn’t work, switch to a toilet auger. Insert the auger into the toilet drain and crank it clockwise to navigate through and break up the blockage. Take care to avoid using excessive force to prevent damage. 

What is the best thing to pour in a toilet to unclog it?  

One effective method is pouring hot water into the toilet bowl from waist height. This can help break down the clog, especially if it’s caused by organic materials like toilet paper. Alternatively, a mixture of baking soda and vinegar followed by hot water can also help dissolve the blockage. However, avoid using harsh chemicals as they can damage your plumbing. 

How long will it take for a toilet to unclog itself?  

Toilets typically don’t unclog on their own. If the clog is minor, it might clear with repeated attempts using a plunger or auger. However, if the blockage persists after several tries, it’s best to call a professional plumber. Waiting too long can exacerbate the problem and potentially cause more damage to your plumbing system. 

What do plumbers use to unclog toilets?  

Plumbers use specialized tools like plungers and toilet augers. A plunger creates pressure to dislodge clogs by creating a vacuum, while an auger is designed to navigate through the toilet drain and break apart more stubborn obstructions. For particularly tough clogs, plumbers may also employ hydro-jetting equipment that uses high-pressure water to clear pipes effectively. 

Leaking faucet with repair tools: Learn how to fix a leaking faucet with DIY tips or professional plumbing services near you. Lochard HVAC, Plumbing and Service offers expert assistance in Sidney, Piqua, and Troy. Keywords: Fix a leaking faucet, Leaking faucet repair, DIY plumbing tips, Plumbing services near me, Lochard HVAC, Expert plumbing assistance, Sidney OH plumbing, Piqua OH plumber, Troy OH plumbing services, Faucet leak troubleshooting. Plumbing Services Troy, Plumbing Services Piqua, Plumbing Services Sidney, Plumbing Services Bellefontaine, Plumbing Services Tipp City, Plumbing Services Wapakoneta, Plumbing Services Celina, Plumbing Services St. Marys, Plumbing Services Versailles, Plumbing Services New Bremen, Plumbing Services Anna, Plumbing Services Minster, Plumbing Services Covington, Plumbing Services St. Paris, Plumbing Services Botkins, Plumbing Services Russia, Plumbing Services Ft. Loramie, Plumbing Services De Graff, Plumbing Services Jackson Center, Plumbing Services Quincy, Plumbing Services Houston, Plumbing Services West Milton, Plumbing Services Bradford, Plumbing Services Indian Lake, Plumbing Services Casstown, Plumbing Services Kettlersville

How to Fix a Leaking Faucet

Fix That Annoying Drip: A Guide to Addressing Leaking Faucets 

Is that constant drip from your faucet keeping you awake at night? A leaking faucet isn’t just annoying; it can lead to wasted water and higher bills. Before you grab your toolbox or search “plumber near me,” here’s a guide to help you tackle the issue yourself and know when it’s time to call in the professionals. 

DIY Tips to Fix a Leaking Faucet 

  • Identify the Type of Faucet: Faucets come in diverse types such as compression, ball, cartridge, and ceramic disk. Understanding your faucet type is crucial for effective repairs.
  • Turn Off the Water Supply: Before starting any repairs, shut off the water supply to the affected faucet. Look for shut-off valves under the sink or turn off the main water supply if necessary.
  • Inspect for Visible Issues: Check for obvious problems like loose handles, worn-out washers, or corroded parts. Tighten loose parts or replace damaged components as needed.
  • Replace the Faucet Washer: A worn-out washer is a common cause of faucet leaks. To replace it, turn off the water supply, disassemble the faucet, remove the old washer, and install a new one of the same size and shape.
  • Clean the Faucet Parts: Sediment buildup or debris inside the faucet can cause leaks. Clean the aerator and other parts thoroughly to ensure smooth water flow and prevent future issues.
  • Check the O-Rings: O-rings seal the faucet’s moving parts and can deteriorate over time. Inspect and replace them if necessary to stop leaks around the faucet base.

When to Call a Plumber Near Me 

Sometimes, DIY efforts aren’t enough to fix a leaking faucet. Here are signs it’s time to call a professional plumber: 

  • Persistent Leaks: If the leak continues despite your DIY attempts, it may indicate a more complex issue that requires professional intervention. 
  • Older Plumbing Systems: Aging pipes and fixtures may need expert assessment and replacement to ensure long-term reliability. 
  • Specialized Tools Needed: Some repairs, such as dealing with corroded pipes or hidden leaks, require specialized tools and the expertise that professional plumbers possess. 

Expert Plumbing Services

At Lochard HVAC, Plumbing and Service, we understand the frustration of dealing with plumbing issues. Whether you’re facing a leaking faucet, clogged drain, or need emergency plumbing repairs, our certified technicians are here to help. Serving homeowners and businesses across Sidney, Piqua, Troy, Bellefontaine, Tipp City, and Celina, OH, we offer prompt and reliable plumbing solutions. 

Contact Us Today! 

Don’t let a leaking faucet disrupt your peace of mind. If DIY fixes aren’t doing the trick, contact Lochard HVAC, Plumbing and Service for expert plumbing services near you. Call (937) 492-8811, or schedule an appointment online to get your plumbing back on track. Next time you face a plumbing challenge, remember; understanding when to DIY and when to call a plumber can save you time, money, and hassle. Take control of your plumbing with confidence! 

FAQs 

How to fix a leaking faucet? 

Fixing a leaking faucet begins with turning off the water supply to prevent further water wastage. Depending on the type of faucet—whether compression, ball, cartridge, or ceramic disk—you’ll need to disassemble it carefully. Look for worn-out washers, O-rings, or corroded parts that may be causing the leak. Clean any sediment buildup and replace the faulty components. Reassemble the faucet and test it to ensure the leak is resolved. If you’re unsure or encounter difficulties during the process, it’s wise to consult with a professional plumber for expert assistance. 

How do I stop my faucet from dripping? 

Stopping a faucet from dripping involves a systematic approach to identify and address the underlying issue. Begin by shutting off the water supply and inspecting the faucet for loose handles, worn-out washers, or damaged seals. Tighten any loose parts and replace worn-out components as needed. If the dripping persists, it could indicate a more complex problem that requires professional attention. Contacting a qualified plumber ensures thorough diagnosis and effective resolution of the dripping faucet issue, preventing water wastage and potential damage to your plumbing system. 

Can you fix a leaky faucet yourself? 

Fixing a leaky faucet yourself is possible with the right tools and knowledge, but it depends on the complexity of the issue. Start by turning off the water supply and disassembling the faucet to inspect for visible problems such as worn-out washers, O-rings, or sediment buildup. Clean or replace the faulty components and reassemble the faucet carefully. Test for leaks and functionality. However, if you’re uncertain about the repair process or encounter challenges, it’s advisable to seek professional help. Professional plumbers have the expertise to handle various faucet types and ensure long-lasting repairs. 

What is the most common cause of a leaky faucet? 

The most frequent cause of a leaky faucet is often worn-out washers or O-rings within the faucet mechanism. These rubber or silicone components can degrade over time due to constant use, resulting in leaks around the handle or spout. Other common causes include sediment buildup, high water pressure, or improper installation. Addressing these issues promptly can prevent further water wastage and potential damage to your plumbing fixtures. Consulting with a professional plumber ensures accurate diagnosis and effective repair of the underlying faucet issue. 

Is it worth fixing a leaky faucet? 

Fixing a leaky faucet is worthwhile for several reasons. Apart from stopping water wastage, which can add up to significant costs over time, repairing a leaky faucet prevents potential damage to your plumbing system and home. Additionally, ignoring a leaking faucet can lead to mold growth, water stains, and structural damage. Prompt repair not only saves money on water bills but also enhances the longevity of your plumbing fixtures. Professional plumbers offer efficient and cost-effective solutions to fix leaky faucets, ensuring peace of mind and optimal functionality of your plumbing system. 

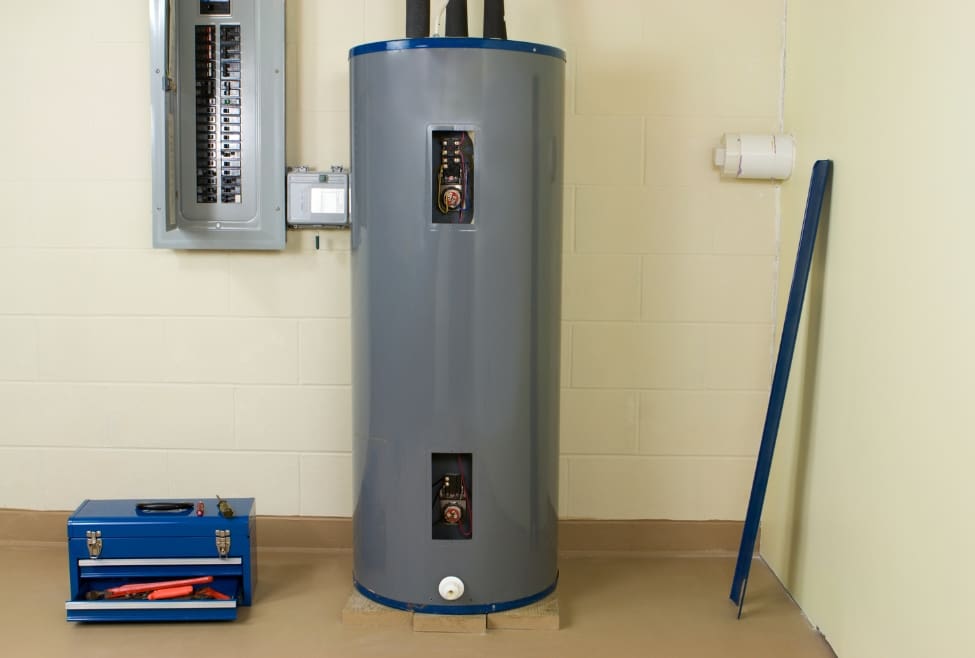
Water heater with tool box nearby: 'Why Is My Water Heater Not Producing Hot Water?' Lochard HVAC, Plumbing and Service provides water heater repair and AC services in Troy, Piqua, Sidney. Keywords: Water heater not producing hot water, water heater repair, hot water issues, water heater troubleshooting, plumbing services, expert plumber, Lochard HVAC, Troy OH, Piqua OH, Sidney OH. HVAC Services Troy, HVAC Services Piqua, HVAC Services Sidney, HVAC Services Bellefontaine, HVAC Services Tipp City, HVAC Services Wapakoneta, HVAC Services Celina, HVAC Services St. Marys, HVAC Services Versailles, HVAC Services New Bremen, HVAC Services Anna, HVAC Services Minster, HVAC Services Covington, HVAC Services St. Paris, HVAC Services Botkins, HVAC Services Russia, HVAC Services Ft. Loramie, HVAC Services De Graff, HVAC Services Jackson Center, HVAC Services Quincy, HVAC Services Houston, HVAC Services West Milton, HVAC Services Bradford, HVAC Services Indian Lake, HVAC Services Casstown, HVAC Services Kettlersville

Why Is My Water Heater Not Producing Hot Water?

Why Your Water Heater Isn’t Producing Hot Water 

Are you facing the frustration of turning on your faucet or shower only to be greeted by icy cold water? If so, you’re not alone. Many homeowners encounter issues with their water heaters, like their water heater not heating, especially during the chilly months. Lochard HVAC, Plumbing and Service is here to shed light on this common problem and provide solutions to ensure you enjoy hot showers and warm water whenever you need it. 

Understanding the Issue 

When your water heater isn’t heating water correctly, it can disrupt your daily routine and leave you feeling uncomfortable. But what could be causing this inconvenience? Let’s explore some common reasons: 

Sediment Buildup

Over time, sediment can accumulate at the bottom of your water heater tank, hindering its ability to heat water efficiently. 

Faulty Heating Element

A malfunctioning heating element can prevent your water heater from heating water to the desired temperature. 

Thermostat Issues

If your thermostat is set too low or is malfunctioning, it may not signal the water heater to heat water adequately. 

Pilot Light Problems

For gas-powered water heaters, a faulty pilot light can lead to a lack of hot water. 

Leaks or Pipe Blockages

Any leaks or blockages in your water heater or plumbing system can disrupt the flow of hot water. 

Finding a Solution 

When faced with a water heater that refuses to produce hot water, it’s essential to act swiftly to diagnose and resolve the issue. Here’s how Lochard HVAC, Plumbing and Service can help: 

Expert Diagnosis

Our team of experienced plumbers will thoroughly inspect your water heater to identify the root cause of the problem. 

Prompt Repairs

Once the issue has been identified, we’ll provide prompt and efficient repairs to restore your water heater to optimal functioning. 

Preventive Maintenance

To prevent future issues, we offer preventive maintenance services to keep your water heater in top condition. 

Replacement Services

If your water heater is beyond repair, we offer professional installation services for new, energy-efficient water heaters. 

Service Areas 

Lochard HVAC, Plumbing and Service proudly serves homes and businesses in Troy, Piqua, Sidney, Bellefontaine, Tipp City, Celina, OH and the surrounding areas. 

Expert Water Heater Services 

Don’t let a malfunctioning water heater leave you out in the cold. Trust Lochard HVAC, Plumbing and Service to provide expert solutions to ensure your water heater produces hot water when you need it most. Contact us today for reliable plumbing services and get back to enjoying the comforts of a warm home. 

Call Us Today – We Are Available 24/7 

Experiencing water heater problems? Don’t wait! Contact Lochard HVAC, Plumbing and Service today at (937)-492-8811 for prompt and professional plumbing solutions. Remember, hot water is just a call away!


FAQs 

How to restart a hot water heater?  

Restarting a hot water heater can be done by first checking the power source to ensure it’s functioning correctly. If you have an electric water heater, locate the thermostat and reset it to the desired temperature. For gas water heaters, relighting the pilot light according to the manufacturer’s instructions is crucial. After performing these steps, give the water heater some time to heat up the water before testing the faucets. If issues persist, it might be time to call a professional plumber for further inspection and repairs. 

Why is my hot water not working but cold is?  

It can be frustrating when your hot water isn’t working while the cold water functions fine. Several factors could contribute to this issue, such as a thermostat set too low, a faulty heating element, sediment buildup in the tank hindering heat transfer, or a malfunctioning pilot light in gas water heaters. Identifying the specific cause of the problem may require professional diagnosis by a qualified plumber near you to ensure a timely and effective solution. 

What happens if I push the reset button on my water heater?  

The reset button on your water heater is a safety feature designed to trip when it detects issues with the heating element or thermostat. Pressing the reset button attempts to restart the water heater and reset any tripped safety mechanisms. However, if the problem persists after resetting, it’s essential to avoid repeatedly pushing the button, as this could indicate a more significant underlying issue. In such cases, it’s best to contact a professional plumber for thorough inspection and necessary repairs to ensure the continued functionality of your water heater. 

How to check if a hot water tank is working?  

Verifying the functionality of your hot water tank involves several steps. Begin by turning on a hot water faucet and observing the temperature of the water. Additionally, listen for any sounds indicating the water heater is kicking on and off, which signifies proper operation. While the hot water is running, inspect the area around the water heater for any signs of leaks or water damage. If you notice any irregularities or the water isn’t heating correctly, it’s advisable to seek the expertise of a professional plumber for a thorough assessment and necessary repairs. 

Can a hot water tank get air locked?  

Yes, airlocks in hot water tanks can occur, particularly after maintenance or repairs. An airlock prevents the flow of hot water by trapping air in the water pipes or tank. To address this issue, attempt to bleed the air out of the system by opening hot water faucets throughout your home. If the problem persists, it’s advisable to contact a plumber near you for assistance in resolving the airlock and ensuring the proper functioning of your hot water system. 

Showerhead with low water stream indicating low water pressure in the shower. Expert solutions available in Troy, Piqua, and Sidney, Ohio with Lochard HVAC, Plumbing, and Service. Keywords: Low water pressure in the shower, Broken shower, Low water stream, Showerhead issues, Bathroom plumbing problems, Troubleshooting shower water pressure, Shower repair services, Plumbing solutions, Expert plumbers. Plumber near me: Plumber Troy, Plumber Piqua, Plumber Sidney, Plumber Bellefontaine, Plumber Tipp City, Plumber Wapakoneta, Plumber Celina, Plumber St. Marys, Plumber Versailles, Plumber New Bremen, Plumber Anna, Plumber Minster, Plumber Covington, Plumber St. Paris, Plumber Botkins, Plumber Russia, Plumber Ft. Loramie, Plumber De Graff, Plumber Jackson Center, Plumber Quincy, Plumber Houston, Plumber West Milton, Plumber Bradford, Plumber Indian Lake, Plumber Casstown, Plumber Kettlersville.

What Causes Low Water Pressure in the Shower?

Troubleshooting Low Water Pressure in the Shower

Are you frustrated by the weak trickle of water coming from your showerhead? Low water pressure can turn your refreshing shower into a disappointing experience. At Lochard HVAC, Plumbing, and Service, we understand the importance of a satisfying shower, and we’re here to help you troubleshoot and resolve this common issue.

Identifying the Problem

The first step in addressing low water pressure in your shower is to identify the root cause. Here are some common culprits:

  • Clogged Showerhead: Over time, mineral deposits and sediment can build up in your showerhead, restricting water flow.
  • Faulty Pressure Regulator: If your home has a pressure regulator, it may be malfunctioning and reducing water pressure throughout the house.
  • Leaky Pipes: Hidden leaks in your plumbing system can lead to water loss and decreased pressure, particularly in older homes.
  • Corroded Pipes: Rust and corrosion can accumulate inside pipes, causing blockages and hindering water flow to your shower.

Troubleshooting Steps

Once you’ve identified potential causes of low water pressure, you can take steps to address them:

  • Clean the Showerhead: Remove the showerhead and soak it in vinegar to dissolve mineral deposits. Scrub any remaining residue with a brush before reinstalling.
  • Check the Pressure Regulator: Locate the pressure regulator in your home and inspect it for damage or malfunction. If necessary, adjust or replace the regulator to restore proper water pressure.
  • Inspect for Leaks: Check for signs of water leakage around pipes, fixtures, and fittings. Even small leaks can contribute to decreased water pressure over time.
  • Schedule Professional Inspection: If you’re unable to pinpoint the cause of low water pressure, it’s time to call in the experts. Our certified plumbers at Lochard HVAC, Plumbing, and Service can conduct a thorough inspection of your plumbing system to identify and resolve any issues.

Expert Solutions from Lochard HVAC, Plumbing, and Service

As your trusted local plumber, Lochard HVAC, Plumbing, and Service offers a comprehensive range of plumbing services to address all your needs. From leak detection and repair to pipe cleaning and replacement, our experienced technicians have the skills and expertise to ensure your plumbing system operates smoothly.

If you’re experiencing low water pressure in your shower or any other plumbing issues, don’t hesitate to reach out to us at 937-492-8811. We proudly serve homeowners and businesses in Troy, Piqua, Sidney, Bellefontaine, Tipp City, and Wapakoneta. Contact us today for reliable solutions and exceptional service.

Call Us Today – We Are Available 24/7

Ready to restore optimal water pressure in your shower? Contact Lochard HVAC, Plumbing, and Service today for expert plumbing solutions. Don’t let low water pressure ruin your shower experience – trust our certified plumbers to get the job done right!

FAQs


How do I fix low water pressure in my shower?

To address low water pressure in your shower, start by checking the showerhead for any blockages caused by mineral deposits or debris. You can do this by removing the showerhead and soaking it in vinegar to dissolve any buildup. If that doesn’t improve the water pressure, check for leaks in the pipes leading to the shower and ensure that the shut-off valve is fully open. If you’re still experiencing issues, it’s best to consult a professional plumber to diagnose and resolve the problem.

Why is there no water pressure in my shower but plenty everywhere else?

When you’re experiencing low water pressure in your shower but not in other areas of your home, it could indicate a localized issue with the shower’s plumbing system. Potential causes include a clogged showerhead, a malfunctioning pressure regulator, or a leak in the pipes leading to the shower. It’s essential to address these issues promptly to prevent further damage and inconvenience.

What is the most common cause of low water pressure?

Low water pressure can be caused by various factors, but one of the most common culprits is a buildup of sediment and mineral deposits in the plumbing system. Over time, these deposits can accumulate in pipes, fixtures, and showerheads, restricting water flow and reducing pressure. Other common causes include leaks in the plumbing system, faulty pressure regulators, and issues with the municipal water supply.

Why is there no water in my shower but the sinks are fine?

If you’re experiencing a lack of water in your shower while other fixtures in your home have adequate flow, there may be a specific issue with the shower’s plumbing system. Possible causes include a clogged showerhead, a malfunctioning diverter valve, or a blockage in the pipes leading to the shower. It’s essential to address these issues promptly to restore proper water flow and prevent further damage to your plumbing system.

Is there a shut-off valve for showers?

Yes, showers typically have shut-off valves that control the flow of water to the showerhead. These valves are usually located behind the wall or in an access panel, and they allow you to shut off the water supply to the shower for maintenance or repairs. If you’re experiencing issues with water flow in your shower, it’s essential to check that the shut-off valve is fully open and functioning correctly. If you’re unsure how to locate or operate the shut-off valve, consult a professional plumber for assistance.

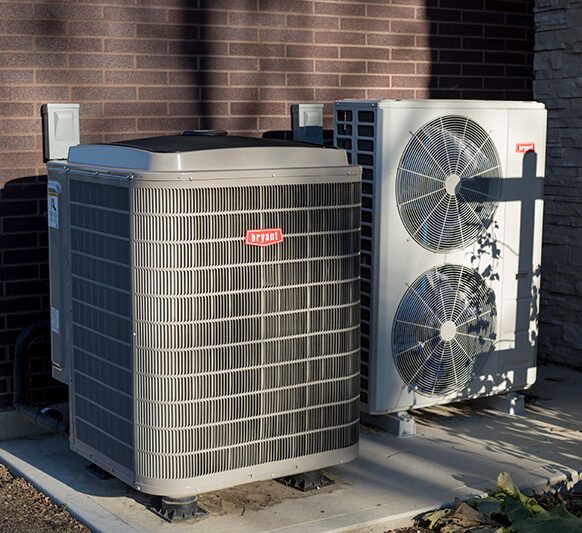
Outdoor air conditioning unit prepared for summer cooling season with clean condenser coils, improved airflow, AC maintenance service, HVAC system inspection, and preventive air conditioning repair by Lochard HVAC, Plumbing, and Service to help reduce cooling problems, weak airflow, and high energy bills during hot weather.

How to Prepare Your AC System for Summer

Get Your Air Conditioner Ready Before Summer Temperatures Spike

Understanding how to prepare your AC system for summer can help homeowners avoid breakdowns, weak airflow, rising energy bills, and uncomfortable indoor temperatures once the hottest part of the year arrives. Many cooling problems start developing long before summer officially begins. By the time the first heat wave hits, small issues like dirty coils, clogged filters, or low refrigerant can quickly turn into expensive AC repair calls.

At Lochard HVAC, Plumbing, and Service, we often see preventable cooling issues that could have been caught earlier with simple seasonal preparation. The good news is that many of the most important maintenance steps are straightforward and can significantly improve your system’s performance, efficiency, and reliability throughout the summer season.

Why Summer AC Preparation Is Important

Your air conditioning system works hardest during hot weather. If airflow is restricted or components are already worn down from previous seasons, the system has to run longer and harder to maintain comfortable temperatures.

Preparing your system early can help:

  • Improve cooling performance
  • Reduce energy consumption
  • Lower utility bills
  • Prevent mid-summer breakdowns
  • Extend equipment lifespan
  • Improve indoor air quality
  • Reduce strain on the compressor

Even newer systems benefit from seasonal maintenance and inspection.

Start With the Air Filter

One of the most overlooked parts of HVAC maintenance is the air filter. A dirty filter can dramatically reduce airflow, forcing the system to work harder while delivering less cooling. Restricted airflow can also contribute to frozen evaporator coils and AC short cycling.

Signs your filter may need replacement include:

  • Weak airflow from vents
  • Dust buildup around registers
  • Longer cooling cycles
  • Uneven room temperatures
  • Increased allergy symptoms indoors

During heavy cooling season, many homeowners should replace filters every 1 to 3 months depending on pets, allergies, and household conditions.

Clean the Outdoor Condenser Unit

The outdoor AC condenser releases heat from your home. If the condenser becomes blocked by leaves, grass, dirt, or debris, cooling efficiency can drop significantly.

To help improve airflow:

  • Remove weeds and debris around the unit
  • Keep at least 2 feet of clearance around the condenser
  • Gently rinse condenser coils with water
  • Inspect for visible damage or bent fins

Good airflow around the outdoor unit helps reduce strain on the AC compressor, especially during high temperatures.

Test Your System Before Peak Summer Heat

One of the best ways to avoid emergency repairs is running your air conditioner before extremely hot weather arrives. Turn the system on early in the season and monitor how it performs.

Pay attention to:

Catching these warning signs early gives you more time to schedule professional HVAC repair before summer demand increases.

Check Thermostat Performance

Sometimes homeowners think the air conditioner is failing when the thermostat is actually causing the issue.

Before summer begins:

  • Confirm the thermostat is set to cooling mode
  • Replace batteries if needed
  • Check programmed schedules
  • Verify temperature accuracy
  • Make sure sunlight is not directly hitting the thermostat

An outdated thermostat may also reduce cooling efficiency or contribute to uneven temperatures.

Inspect Air Vents and Indoor Airflow

Your HVAC system depends on balanced airflow throughout the home. Closed vents or blocked return ducts can affect cooling performance and increase system strain.

Walk through the home and:

  • Open all supply vents
  • Remove furniture blocking vents
  • Check for excessive dust buildup
  • Inspect return vents for blockage

Proper airflow can help prevent frozen evaporator coils and uneven cooling issues.

Watch for Signs of Refrigerant Problems

Low refrigerant is a common reason homeowners experience poor cooling performance during summer. Since refrigerant circulates in a sealed system, low levels often indicate a leak.

Common symptoms include:

  • AC blowing warm air
  • Ice on refrigerant lines
  • Hissing sounds
  • Longer cooling cycles
  • Higher indoor humidity

Because refrigerant handling requires certification, professional air conditioning diagnostics are recommended for these issues.

Don’t Ignore Electrical Warning Signs

Electrical components often fail under heavy summer demand. Problems involving capacitors, contactors, or wiring may appear gradually before complete system failure occurs.

Watch for:

  • Clicking sounds
  • Humming from the outdoor unit
  • AC struggling to start
  • Frequent breaker trips
  • Intermittent cooling

These symptoms may indicate developing electrical problems that should be addressed early.

Why Professional AC Maintenance Matters

While homeowners can handle basic maintenance tasks, professional inspections often uncover hidden problems that are difficult to detect without testing equipment.

During a professional AC maintenance service, technicians may:

  • Measure refrigerant pressure
  • Inspect electrical components
  • Test capacitor performance
  • Clean evaporator coils
  • Verify thermostat calibration
  • Measure airflow and temperature differences
  • Check condensate drainage

Routine maintenance can help improve reliability and reduce unexpected repair costs during peak summer temperatures.

Common Summer AC Problems Prevented by Maintenance

Seasonal HVAC maintenance can help reduce the risk of:

  • Frozen evaporator coils
  • AC short cycling
  • Compressor overheating
  • Poor airflow
  • Refrigerant leaks
  • Water leaks around the air handler
  • High energy bills
  • Uneven cooling throughout the home

Preventive service often costs far less than emergency repairs or compressor replacement.

Lochard HVAC, Plumbing, and Service provides professional air conditioning repair, AC tune-ups, and HVAC maintenance services throughout Piqua, Troy, Sidney, Bellefontaine, Celina, and Wapakoneta, OH. Our technicians help homeowners prepare cooling systems for reliable summer performance and long-term efficiency.

Schedule Summer AC Maintenance

Knowing how to prepare your AC system for summer can help homeowners stay ahead of common cooling problems before temperatures rise. Simple maintenance steps like replacing filters, cleaning the condenser, testing airflow, and checking thermostat performance can make a major difference in system reliability and comfort.

More importantly, early preparation can reduce stress on critical HVAC components and help prevent emergency breakdowns during the hottest part of the season. When combined with professional AC maintenance, seasonal preparation helps keep your home cooler, more comfortable, and more energy efficient throughout the summer months.

If you want to improve cooling performance and reduce the risk of summer breakdowns, contact Lochard HVAC, Plumbing, and Service for professional AC inspections, air conditioning repair, and preventive HVAC maintenance before peak summer heat arrives.

FAQs

What should I do to my AC unit before summer?

Before summer begins, homeowners should replace the air filter, clean debris around the outdoor AC condenser, test the thermostat, inspect air vents, and make sure the system is cooling properly before temperatures rise. It is also a good idea to schedule professional AC maintenance to check refrigerant levels, electrical components, airflow, and overall cooling efficiency before peak summer demand.

Is 72 too cold for AC in summer?

For many homes, 72 degrees is a comfortable indoor temperature during summer, but the ideal thermostat setting depends on humidity levels, insulation, and personal comfort preferences. Lower thermostat settings can increase energy usage and place additional strain on the air conditioning system, especially during extreme heat. Many homeowners balance comfort and efficiency by setting temperatures slightly higher when away from home.

What are 6 things to do before turning on air conditioning?

Before turning your air conditioner on for the season, it helps to:

  1. Replace the air filter
  2. Clean around the outdoor condenser unit
  3. Check thermostat settings and batteries
  4. Open and inspect air vents
  5. Test airflow and cooling performance
  6. Schedule seasonal HVAC maintenance

These steps can help improve airflow, reduce cooling problems, and lower the chance of emergency AC repair during summer.

How can I lower my AC bill in the summer?

You can lower summer cooling costs by replacing dirty filters regularly, using a programmable thermostat, sealing air leaks around windows and doors, and keeping the outdoor condenser clean. Routine air conditioning maintenance also improves efficiency by helping the system cool more effectively with less energy use. Reducing strain on the system can help prevent high utility bills during periods of extreme heat.

How often should AC be serviced?

Most HVAC professionals recommend scheduling AC maintenance service at least once per year, ideally in the spring before summer temperatures arrive. Annual maintenance helps identify worn components, refrigerant issues, airflow restrictions, and electrical problems before they cause major cooling system failures. Systems that receive regular maintenance often operate more efficiently and experience fewer unexpected repairs.

If you want your cooling system ready for warmer weather, Lochard HVAC, Plumbing, and Service provides professional AC tune-ups, air conditioning inspections, and HVAC maintenance services to help keep your home comfortable all summer long. Contact us today!